Collection SS6
วันจันทร์ที่ 28 มกราคม พ.ศ. 2556
วันเสาร์ที่ 19 มกราคม พ.ศ. 2556
รวมรูปภาพตุ๊กตาหมีจากเว็บ บ้านตุ๊กตา.com
รวมรูปภาพตุ๊กตาหมียิ้มและหลับ ภาพอย่างเป็นทางการจากเว็บ บ้านตุ๊กตา.com
ถ่ายมาแสดงให้ชมกันว่า มีของจริง ส่งจริง ทุกตัวค่ะ :)
วันพุธที่ 16 มกราคม พ.ศ. 2556
Jarred everson

11 December 2012
The Hive was originally a 2D image by famous concept artist Sang Han. It was one of the most widely acclaimed concept art piece to come out of the Dominance Wars IV contest. Recently, 3D master Jarred Everson was planning on giving it a 3D life using, among other tools, Substance Designer, I thought it would be a great opportunity to watch the development of ‘The Hive from 2D to 3D.
The Original 2D SANG HAN The Hive Image from Dominance War IV.
"SUBSTANCE HAS OPENED THE DOORS TO NEAR INFINITE POSSIBILITIES" - Jarred Everson
Jarred Everson has worked in Broadcast, Film, and the Game industry for over a decade now. He's shipped four titles, currently working on his fifth at a rather large southern California game developer.
Everson works from home, knowing that he would be doing 3D all day long at an office. "I work from home because I can create whatever I want, it's the more artistic side to what I do, I love my job, and the work I do, but at home I get to do everything the way I want to," he says. "I get to conceptualize, model, texture, light, paint, characters, and environments using tools that work best for me, there are no deadlines at home, so I have time to play with different tools."
วันอังคารที่ 15 มกราคม พ.ศ. 2556
Mari texture challenge
Mari texture challenge

CGSociety :: Special Feature
16 December 2012
The Winners of The Foundry and CGSociety's Texture Challenge have been chosen and here are the results. Some amazing texture creations were entered and a heady array of patterns were adorned on the model. The Foundry, makers of the 3D digital paint tool, MARI, supplied participants with the model "Witch Doctor" by the wonderful Jakob Kousholt. As well as this, The Foundry offered a 60-day trial of the MARI software for the duration of the challenge, which was plenty of time for participants who'd maybe not used the software before, to get to grips with this incredibly powerful tool.
There was even a CGWorkshop staged to allow artists to get a headstart and introduction to the workflow best suited to the MARI texturing pipeline.
At the time of the competition closing, there had been a very healthy 266 MARI licences registered for the competition, 536 images uploaded and of them, 40 contestants pushed through to upload their final entries.
CGSociety and The Foundry would also like to thank NVIDIA as well for the involvement and sponsorship of the contest.
วันจันทร์ที่ 14 มกราคม พ.ศ. 2556
CG retrosspective 2012
CGSociety :: Special Feature
2 January 2013, by Paul Hellard
CGSociety is very pleased to present the Top 20 list for 2012. In collating this traditional retrospective as voted by you, the CGSociety community, we called out for nominations between November 5 and December 22 on a thread especially opened on CGTalk. Items could be anything related to the Computer Graphics industry. It could be software releases, new hardware, movies, games, short films, in fact any product that made our lives better or filled us with awe while in the pursuit and creation of better CG and VFX. Over 4,130 people viewed and contributed to the thread and now, at the start of this next exciting year, we present the 2012 Retrospective Top 20.
วันพฤหัสบดีที่ 10 มกราคม พ.ศ. 2556
The Gnomon Workshop - Fundamentals of Perspective Vol.1-3 with Gary Meyer
The Gnomon Workshop - Fundamentals of Perspective Vol.1-3 with Gary Meyer
ดูภาพขยาย
วิดีโอสอนการสเก็ตภาพ Perspective เรียนรู้ทุกเทคนิคสำหรับดีไซน์และการออกแบบต่างๆ เมื่อเราทำถูกต้องคนที่รับงานเราไปดูต่อก็จะไม่งง และการเรียนรู้วาดภาพแบบ Perspective ก็เป็นหนึ่งในพื้นฐานของการวาดภาพแทบทุกอย่างที่นักวาดภาพควรเรียนรู้เป็น อย่างยิ่ง สอนโดยมืออาชีพในวงการ Gary Meyer รวม 3 ชุดในราคาพิเศษ หรือแยกซื้อได้ครับ
หรือสนใจสั่งซื้อแยกแผ่นก็ตามนี้เลยครับ
ตอนที่ 1 - 2DVD ราคาพิเศษเพียง 180 บาท
ตอนที่ 2 - 2DVD ราคาพิเศษเพียง 180 บาท
ตอนที่ 3 - 1DVD ราคา 100 บาท
The Gnomon Workshop - Fundamentals of Perspective 3 - Three-Point Principles and Concepts with Gary Meyer
B 100.00

วิดีโอสอนการสเก็ตภาพ Perspective
เรียนรู้ทุกเทคนิคสำหรับดีไซน์และการออกแบบต่างๆ
เมื่อเราทำถูกต้องคนที่รับงานเราไปดูต่อก็จะไม่งง และการเรียนรู้วาดภาพแบบ
Perspective
ก็เป็นหนึ่งในพื้นฐานของการวาดภาพแทบทุกอย่างที่นักวาดภาพควรเรียนรู้เป็น
อย่างยิ่ง สอนโดยมืออา
รายละเอียดสินค้า...The Gnomon Workshop - Fundamentals of Perspective 2 - Two-Point Principles and Concepts with Gary Meyer
B 200.00
B 180.00
ท่านประหยัดได้: B 20.00
B 180.00
ท่านประหยัดได้: B 20.00

วิดีโอสอนการสเก็ตภาพ Perspective
เรียนรู้ทุกเทคนิคสำหรับดีไซน์และการออกแบบต่างๆ
เมื่อเราทำถูกต้องคนที่รับงานเราไปดูต่อก็จะไม่งง และการเรียนรู้วาดภาพแบบ
Perspective
ก็เป็นหนึ่งในพื้นฐานของการวาดภาพแทบทุกอย่างที่นักวาดภาพควรเรียนรู้เป็น
อย่างยิ่ง สอนโดยมืออา
รายละเอียดสินค้า...The Gnomon Workshop - Fundamentals of Perspective 1 - One-Point Principles and Concepts with Gary Meyer
B 200.00
B 180.00
ท่านประหยัดได้: B 20.00
B 180.00
ท่านประหยัดได้: B 20.00

วิดีโอสอนการสเก็ตภาพ Perspective
เรียนรู้ทุกเทคนิคสำหรับดีไซน์และการออกแบบต่างๆ
เมื่อเราทำถูกต้องคนที่รับงานเราไปดูต่อก็จะไม่งง และการเรียนรู้วาดภาพแบบ
Perspective
ก็เป็นหนึ่งในพื้นฐานของการวาดภาพแทบทุกอย่างที่นักวาดภาพควรเรียนรู้เป็น
อย่างยิ่ง สอนโดยมืออา
รายละเอียดสินค้า...The Gnomon Workshop – Fundamentals of Perspective with Gary Meyer
19.6 GB | English | 8h37min | MOV | 1280?720
The series includes an introduction to one-point, two-point and three-point perspective along with examples of projecting from plans, transferring scale, drawing inclined surfaces, plotting ellipses, shadows and reflections in perspective.
In Fundamentals of Perspective 1: One-Point Principles and Concepts, the viewer is first introduced to the tools and definitions used in one-point perspective. One-Point perspective is demonstrated through a series of exercises indicating the relationship of the viewer with the picture plane and the object that is to be constructed.
Home Page: _http://www.thegnomonworkshop.com/store/product/1014/
In Fundamentals of Perspective 2: Two-Point Principles and Concepts a series of two-point examples include measuring point perspective, projecting from plans and elevations and repeating rectangles in foreshortened perspective are covered in detail. Gary also provides examples of how to correctly draw ellipses in perspective. Inclined planes are also demonstrated using auxiliary vanishing points and vertical vanishing lines.
Home Page: _http://www.thegnomonworkshop.com/store/product/1016/
In Fundamentals of Perspective 3: Three-Point Principles and Concepts initially cover the primary concepts used in three-point perspective and then move on to discussing measuring points to construct an architectural object. Gary then demonstrates the concepts of plotting shadows from natural and artificial light sources in perspective before moving to the final lesson where he demonstrates how to plot reflections while transferring scale in perspective.
Home Page: _http://www.thegnomonworkshop.com/store/product/1019/
This series provides a solid foundation for any artist looking to strengthen their comprehension of the principles and concepts of drawing in one, two and three-point perspective.
วันอังคารที่ 8 มกราคม พ.ศ. 2556
Digital Tutors - Motorcycle Modeling Techniques in CINEMA 4D
Digital Tutors - Motorcycle Modeling Techniques in CINEMA 4D
วิดีโอสอนการขึ้นโมเดลรถมอเตอร์ไซแบบละเอียดสำหรับโปรแกรม Cinema 4D

ดูภาพขยาย
Digital-Tutors – Motorcycle Modeling Techniques in CINEMA 4D
Duration: 5h 20m | Release Date: June 1, 2012 | Author: Justin Marshall
MP4 | 1280?720 | 5h20min | + Exercise files
Required Software: CINEMA 4D R13
In this CINEMA 4D tutorial we will go through the process of building a motorcycle. We will start by setting up reference images for the bike and then use some spline-based tools and techniques to begin building up the molded fairing pieces. We’ll then use CINEMA 4D’s unique, hierarchy based workflow to construct the different elements of the motorcycle. We’ll use box modeling techniques to build up parts like the tank and other body elements. Combining splines will allow us to build complex hard surface shapes like the brake discs. All along the way we’ll talk about smoothing techniques and using symmetry to speed up our workflow. By the end, you’ll have a motorcycle model and knowledge you can apply to your own custom bike or model.
Run Time Release Date
Introduction and project overview Lesson 1
Introduction and project overview 00:56 June 1, 2012
Setting up reference images Lesson 2
Setting up reference images 04:20 June 1, 2012
Starting the main fairing Lesson 3
Starting the main fairing 09:25 June 1, 2012
Finishing the main fairing shape Lesson 4
Finishing the main fairing shape 07:33 June 1, 2012
Redrawing the fairing topology Lesson 5
Redrawing the fairing topology 05:36 June 1, 2012
Modeling the vents Lesson 6
Modeling the vents 09:21 June 1, 2012
Modeling the side lights Lesson 7
Modeling the side lights 09:20 June 1, 2012
Finishing the fairing Lesson 8
Finishing the fairing 06:14 June 1, 2012
Modeling the front light Lesson 9
Modeling the front light 05:23 June 1, 2012
Creating the fuel tank Lesson 10
Creating the fuel tank 09:29 June 1, 2012
Finishing the fuel tank Lesson 11
Finishing the fuel tank 09:11 June 1, 2012
Modeling the seat Lesson 12
Modeling the seat 05:10 June 1, 2012
Blocking in the back end Lesson 13
Blocking in the back end 08:17 June 1, 2012
Finishing the back end Lesson 14
Finishing the back end 09:40 June 1, 2012
Modeling the lights on the back end Lesson 15
Modeling the lights on the back end 08:26 June 1, 2012
Building the middle section Lesson 16
Building the middle section 09:40 June 1, 2012
Finishing the middle section Lesson 17
Finishing the middle section 08:36 June 1, 2012
Building the tires Lesson 18
Building the tires 07:31 June 1, 2012
Building the wheels Lesson 19
Building the wheels 10:15 June 1, 2012
Finishing the wheels Lesson 20
Finishing the wheels 06:46 June 1, 2012
Building the brake discs Lesson 21
Building the brake discs 10:53 June 1, 2012
Building the brake disc attachment Lesson 22
Building the brake disc attachment 06:33 June 1, 2012
Building the brake assembly Lesson 23
Building the brake assembly 08:53 June 1, 2012
Adding the forks Lesson 24
Adding the forks 04:22 June 1, 2012
Building the triple tree Lesson 25
Building the triple tree 07:34 June 1, 2012
Adding the fender Lesson 26
Adding the fender 10:02 June 1, 2012
Modeling the swing arm Lesson 27
Modeling the swing arm 09:34 June 1, 2012
Building the pegs and shifters Lesson 28
Building the pegs and shifters 13:26 June 1, 2012
Starting exhaust pipes Lesson 29
Starting exhaust pipes 07:32 June 1, 2012
Finishing exhaust pipes Lesson 30
Finishing exhaust pipes 09:03 June 1, 2012
Building the handlebars Lesson 31
Building the handlebars 09:23 June 1, 2012
Finishing the handlebars Lesson 32
Finishing the handlebars 08:30 June 1, 2012
Modeling the gauges Lesson 33
Modeling the gauges 10:50 June 1, 2012
Adding rear view mirrors Lesson 34
Adding rear view mirrors 07:37 June 1, 2012
Adding the windscreen Lesson 35
Adding the windscreen 07:53 June 1, 2012
Modeling the chain Lesson 36
Modeling the chain 10:04 June 1, 2012
Modeling the sprocket Lesson 37
Modeling the sprocket 07:53 June 1, 2012
Adding piece between fairing and body Lesson 38
Adding piece between fairing and body 07:54 June 1, 2012
Building the end piece and adding lights Lesson 39
Building the end piece and adding lights 08:38 June 1, 2012
วันจันทร์ที่ 7 มกราคม พ.ศ. 2556
Lynda - SketchUp Rendering Using Twilight
Lynda - SketchUp Rendering Using Twilight

Twilight ปลั๊กอินเรนเดอร์งาน สำหรับโปรแกรม SketchUp ปลั๊กอินดีๆ
ที่ราคาไม่แพงมาก แต่ให้คุณภาพการเรนเดอร์ที่ดี
ในวิดีโอชุดนี้จะมาสอนการใช้งานปลั๊กอินตัวนี้ครอบคลุมการใช้งานอย่าง
ละเอียด
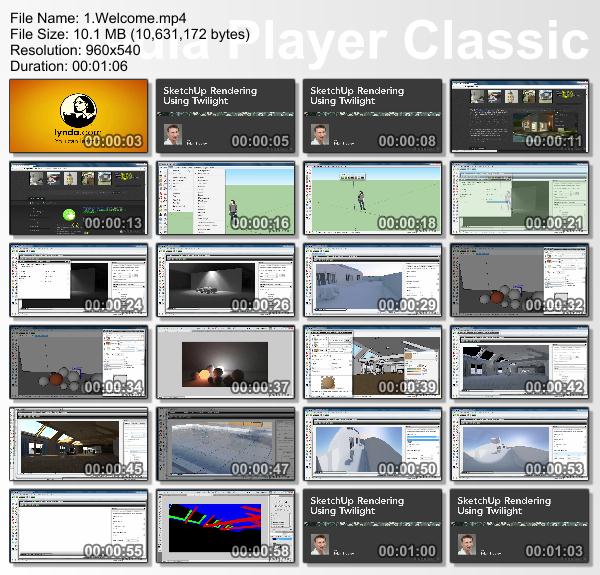
Lynda.com – SketchUp Rendering Using Twilight
Intermediate | 2h 56m Project Files 232 MB | Required Software: Google SketchUp 8, Twilight Render 1.5
Twilight is a very popular and inexpensive third-party renderer for SketchUp. This course shows how to create highly realistic 3D architectural drawings (including interior/exterior elements) with the lights, materials, camera, and render options in Twilight. Author Brian Bradley explains the importance of reflectance in materials, and shows how to manage and save rendering presets, how to correct for perspective, tone, and exposure in the camera, and how to create a variety of material types. The final chapter covers rendering your complete arch-viz scene for a couple types of output, including animation and composites.
Topics include:
+ Installing Twilight
+ Adding the Physical Sun and Sky
+ Employing Point, Spot, and Projector light types
+ Using light emitting materials
+ Managing the Quality Presets
+ Positioning your scene view
+ Working with the camera’s Focal Length setting
+ Creating diffuse, reflective, and refractive surfaces
+ Rendering out an alpha mask
+ Setting up a depth render
Digital Juice - Motion Designers Toolkit 7
Digital Juice - Motion Designers Toolkit 7
Motion Designers Toolkit 7 - Complete (11 DVD9)
6.88GB | 7.48GB | 7.53GB | 7.63GB | 7.73GB | 7.17GB | 7.83GB | 7.57GB | 7.49GB | 7.38GB | 6.89GB
Pushing the Motions Designer's Toolkit line ever closer to the edge, DJ breaks new ground with two brand new packages of gritty, grunge-soaked urban animated elements in the form of Motion Designer's Toolkits 6 & 7. These 2 Volumes of jittery, artistic, roughly-hewn animations took a team of over 40 different artists from a wide variety of artistic fields -- pencil and tablet sketchers, vector design pros, traditional fine artists and a dedicated crew of animators -- well over 8 months to hammer out and whittle down to the collections you see before you.
The possible sources and styles for grungey, urban art elements were so limitless that the hardest task in putting these volumes together was in deciding just which elements made the cut. From stylized tree branches to dirt-filled and scratched surface tiles, from city skylines and angry brush strokes to industrial landscape and pavement cracks -- if it portrayed the urban mood in all its facets, it found its way into these two volumes. Motion Designer's Toolkit 6 contains 17 unique categories of these grunge-infused elements while Motion Designer's Toolkit 7 has 20.
But these collections are more than just a collection of stylized elements. More than ever, we created these animations to be a useful and ongoing resource for your production work for years to come. Whether it's rough framing elements or background textures, revealing paint strokes in different weights and styles or jagged edges with a character that adds a rough and ready look to an over-polished shot -- almost every element is offered as both a ready-to-use prerendered animation AND a customizable After Effects project file. So go ahead, build your own vision of the future imperfect, or evoke the decadence and decay of a bygone era -- or maybe, just have a little fun playing in the dirt.
Features
* 11 jam-packed discs
Filled with pre-rendered animations (simple, compound and looping segments), AE project files, vector graphics, mattes, background tiles and textures.
* 20 Unique Categories:
You get a wide variety of gritty, grungey, rough and natural-looking effects along with everything you need to support those effects in your productions.
* 482 Source After Effects projects:
Want to change or tweak the animations? No problem, almost all of the original AE project files are included.
* Illustrator vector images and high res PNG file extras:
Many animations first start as a beautiful high quality vector or high res raster image. We have provided you with as many of these original source files as possible so that you can translate your designs easily to print and web!
* 512 Quicktime Files:
Ready-to-use high resolution (2000x2000) pre-rendered animations.
11 DVDs
87 Gigabytes
20 Categories
512 Pre-rendered Animations
482 After Effects Projects*
75 Illustrator Vector Files
223 High Resolution Textures and Extras
47 Tileable Animations
16 Entry->Loop->Exit Animations
42 Entry->Exit Animations
71 Looping Animations
60 Matte Files
* The original After Effects projects were provided wherever possible. Not all animations include a project as some were in 3D applications. Some projects do require the use of a third party plugin
Gnomon Workshop - Matte Painting for Production with Jared Simeth
เบื้องหลังการทำซีน 3D game cinematic ที่ต้องใช้ทั้ง 2D matte painting, 3D Camera Integration, Lighting และอื่นๆ จำนวน 1DVD
BEHIND THE SCENES (BTS) is an exciting DVD series developed to showcase the creation of a game cinematic sequence. In this chapter of the series Jared Simeth demonstrates the creation of two matte paintings. Starting with concept paintings provided by BTS Art Director Mark Goerner, Jared goes through the process of creating simple 3D geometry and matching the camera in Maya. In Photoshop? he executes both a pan and tile style 2D matte painting, and one to be used with a 3D camera move. He covers techniques for keying, creating custom brushes and working with Photoshop’s perspective tools. In Maya, Jared shows how to project the painting onto the 3D geometry in preparation for the final camera move. The viewer will also see production meetings in which both the concept and execution are discussed and critiqued.
# Setup in Maya
# 2D Matte Painting
# 3D Camera Integration
# Keying Techniques
# Creating Custom Brushes
# Lighting
# Setting up Projections
# Working with the Art Director
Gnomon Workshop - Matte Painting for Production with Jared Simeth
1. First Production Meeting
2. Setup in Maya
3. 2D Matte Painting Part 1
4. 2D Matte Painting Part 2
5. Second Production Meeting
6. 3D Shot Part 1
7. 3D Shot Part 2
8. 3D Shot Part 3: Finishing
9. 3D Shot Part 4: Projections
10. Third Production Meeting/Outro
กระแสเกมบนแท็บเล็ตมาแรง! เจ้าของ Hay Day ทำเงินได้มากกว่าวันละล้านเหรียญ, เตรียมออกเกมเพิ่มปีหน้า
คุณพร้อมจะพัฒนาเกมลง iOs หรือยัง?
ในช่วงปีนี้เราได้เห็นผลงานของ Supercell ผู้พัฒนาเกม Hay Day ที่ติดกันทั่วบ้านทั่วเมือง และมีนโยบายว่าจะทำเกมลงบนแท็บเล็ตก่อน เพราะมองว่าเป็นอุปกรณ์อันยอดเยี่ยมสำหรับเล่นเกม
ดูเหมือนว่าแนวคิดของ Supercell นั้นจับใจผู้เล่นได้แล้ว ด้วยเวลาที่เพิ่งปล่อยเกมออกมาเพียงสองเกมในรอบหกเดือน (อีกเกมคือ Clash of Clans) ตัวเกมได้รับความนิยมอย่างล้นหลาม ในแง่รายได้ก็เพิ่มขึ้นอย่างต่อเนื่อง ตัวเลขล่าสุดที่ Supercell บอกมาคือราวล้านเหรียญต่อวัน
การเติบโตอย่างรวดเร็วของ Supercell เรียกได้ว่าเป็นการปฏิวัติวงการเกมรอบต่อจาก Angry Birds ที่สามารถเข้าไปแข่งขันกับค่ายเกมใหญ่ๆ ได้
ในปีหน้า Supercell มีแผนจะออกเกมเพิ่มอีก และดูเหมือนว่าจะยังเลือกพัฒนาบนแพลตฟอร์ม iOS เท่านั้นอีกเหมือนเคย
ที่มา - The Next Web
ที่น่าสนใจอีกเรื่องคือทั้ง Supercell และ Rovio ต่างก็เป็นบริษัทสัญชาติฟินแลนด์ทั้งคู่ ถึงตรงนี้หลายคนอาจจะสงสัยว่าทำไมประเทศนี้ถึงสร้างบริษัทเกมหน้าใหม่ได้ เรื่อยๆ แบบนี้
Credit : Blognone
Autodesk 14th Annual 3December Celebration
Autodesk 14th Annual 3December Celebration

(San Francisco, California--November 29, 2012) On December 3, 2012, Autodesk Inc., with support from HP, AMD and Intel, will kick off 3December 2012 - an annual celebration of 3D computer graphics and the artists who create them featuring a series of virtual and live events. From December 3-7, 3D artists around the globe will be able to get an in-depth look at work from some of the industry's top talent, learn from the pros and network with professionals through live events hosted by Autodesk, as well as virtual events, MasterClasses and tutorials hosted on the company's 3December website.
วันพุธที่ 2 มกราคม พ.ศ. 2556
วันอังคารที่ 1 มกราคม พ.ศ. 2556
mocha v3.1 Release

Imagineer Systems has announced its New 3.1 Versions of mocha Pro and mocha AE Improve Lens Distortion Workflow; Adds New Support for ASSIMILATE SCRATCH v7 and HitFilm 2 Ultimate
What’s New in mocha AE v3.1
mocha AE v3.1 strengthens its toolset with a workflow for handling lens distorted footage and format support enhancements including:
-A new Lens Module for analyzing and calibrating clips;
-New mocha Lens plug-in for After Effects users, enabling artists to paste lens data directly to the After Effects timeline to distort or undistort layers. mocha Lens is a free plug-in and works with Adobe CS4-CS6.
-RED (R3D) file support;
-Ability to export color roto shapes to mocha shape for AE plug-in.
-3D Camera Export to HitFilm 2 Ultimate from FXhome
What’s New in mocha Pro v3.1
The development team at Imagineer has invested significant time and resources, working directly with customers, to enhance the mocha Pro workflow, and to ensure it integrates easily with the tools and platforms they use everyday. New features in mocha Pro v3.1 include:
-Greatly improved Lens Module;
-Ability to import and use External Distortion Maps in all mocha Pro modules;
-Ability to export rasterized Distortion Maps for Nuke, Fusion, Flame and more.
-Support for export to new mocha Lens plug-in for After Effects.
-3D Camera export to HitFilm2 from FXhome
-RED (R3D) file support
-Export colored roto shapes directly to Nuke and After Effects (or render externally)
-Seamlessly export Planar Tracking data to Assimilate SCRATCH
mocha v3.1: Lens Calibration Clips and Using Grids video:
mocha Pro v3.1: lens calibration and export to Nuke:
mocha v3.1: Export Color Shapes:
สมัครสมาชิก:
บทความ (Atom)